
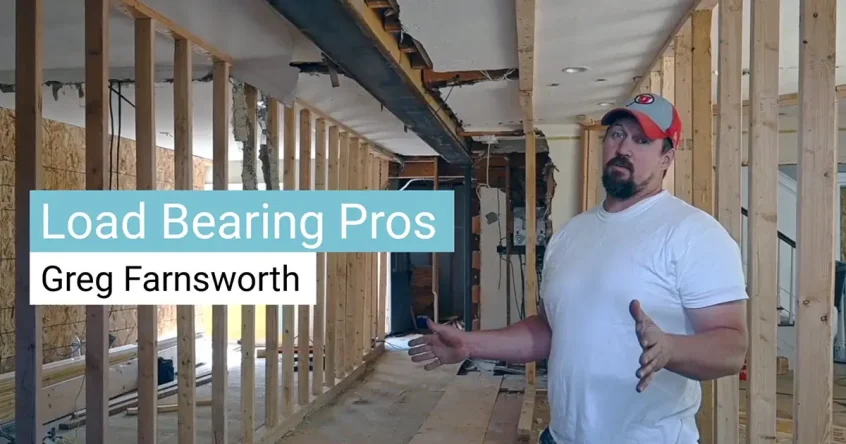
Few home upgrades feel more rewarding than tearing down a wall. But if that wall is holding up your roof or a floor, there’s a lot more at stake than just a changed layout.
Removing a load-bearing wall without the right prep can wreck your foundation, cause sagging ceilings, or worse, it can lead to a partial collapse. You’re dealing with the core support system of your home, and there’s no room for guesswork.
Load bearing wall removal planning is the difference between a smooth renovation and a structural disaster. In this guide, we’ll show you how to plan your wall removal project, step by step.
1) Confirm if the Wall is Load Bearing
Before you get too deep into load bearing wall removal preparation, you need to see if the wall is actually load-bearing.
Not all interior walls hold up weight from above. Some are just partitions and can be taken out with minimal fuss. On the other hand, a load-bearing wall supports the structure of your home—like the roof, floors above, or both.
Look for these signs the wall may be load-bearing:
- It runs perpendicular to ceiling joists.
- It’s located near the center of the house.
- There’s another wall, beam, or post directly above or below it.
- Your home has a second-floor or heavy roof system.
If you’re still unsure, don’t guess. Call in a structural engineer or qualified contractor. They’ll confirm whether the wall is load bearing and help you figure out what needs to be done to safely remove it.
2) Create a Load Bearing Wall Removal Checklist
Now that you’ve confirmed the wall is load-bearing, it’s time to get organized. A well-curated load-bearing wall removal checklist will help you stay on track and avoid surprises.
Here’s what should be on it:
- Hire a structural engineer
- Get city permits
- Determine the replacement support (beam, post, or both)
- Line up your contractor and subs (framers, drywall, electricians)
- Set a realistic budget and timeline
- Prep the area for dust, debris, and disruption
- Make a plan for temporary living space if needed
While this might not be the most exciting part of the project, it’s essential. Skipping these steps is how people end up with massive delays—or bigger problems down the line.
3) Work with a Structural Engineer
A licensed structural engineer will run calculations based on your home’s layout, recommend the right type of beam, determine proper sizing for your placement support, and provide signed drawings needed for permits and contractors.
Hiring a structural engineer may add a few extra hundred to your budget, but it’s worth every penny. A good engineer not only protects your investment but also keeps your project compliant with local building codes.
4) Get the Right Permits
Removing a load-bearing wall almost always requires a building permit. If your contractor says otherwise, consider it a red flag.
A permit protects you, your home, and any future buyers down the road. Plus, not having one can void your insurance coverage if something goes wrong.
Once you’ve got your engineer’s drawings, submit them to your city’s building department. Depending on your location, approvals can take anywhere from a few days to a few weeks.
5) Choose the Right Beam and Support Method
When you remove a load bearing wall, something else has to pick up that load. That “something” is typically a beam — either wood, engineered lumber (like LVL), or steel.
Your engineer will tell you:
- What size beam you need
- What material is best for your project
- If support posts are necessary — and where they should go
Some people want a completely open span with no visible posts. That’s doable in many cases, but it usually means a larger, heavier (and more expensive) beam. Others are fine with a few exposed posts if it means staying on budget. Make that decision early so everyone’s on the same page.
6) Prepare for Demolition Day
Once permits are in hand and your support system is planned, it’s time to get the space ready.
Start by clearing out furniture and valuables from the room. Cover any remaining items and nearby floors with plastic sheeting or drop cloths. Dust from drywall removal spreads quickly, so sealing off adjacent rooms can go a long way in keeping the mess contained.
If you have kids or pets, think ahead. Since the noise, dust, and chaos can be overwhelming for them, consider setting up a temporary hangout space away from the work zone.
7) Let the Pros Do the Heavy Lifting
With load bearing wall removal, your contractor will start by putting up temporary supports—usually in the form of jack posts and beams — to carry the weight while the original wall is taken down.
Once that’s secure, they’ll disconnect any electrical or plumbing in the wall, remove the drywall, and carefully take out the studs. Then, the new beam is installed, followed by any necessary support posts.
As soon as the load is fully transferred, the temporary supports come down.
8) Be Ready for Surprises
Even with solid load-bearing wall removal preparation, things can come up during construction. You might find unexpected plumbing or electrical lines inside the wall. Sometimes the framing isn’t built to code, or the foundation beneath a planned post isn’t strong enough.
That’s why it’s smart to leave room in both your timeline and your budget. Add a 10–20% buffer just in case. Most surprises are fixable, but they can slow things down or bump up your total cost if you’re not ready.
Final Thoughts
Load bearing wall removal planning is about more than logistics. It’s about protecting your home’s structure and making smart choices from start to finish. Take the time to understand what’s involved, follow a detailed load bearing wall removal checklist, and work with pros who know what they’re doing.
At Load Bearing Pros, removing load bearing walls is all we do. We bring decades of experience, expert planning, and clean execution — so you get a safer, stronger home and the open layout you’ve been dreaming of. Contact us for a consultation today!